

Employee Master Data in ERPNext
Guide
An employee is an individual who works for the company whether part time or full time. Employee is considered as a resource, can log time sheets which are billable to the clients.
In ERPNext, you can manage the Employee information through Employee master data which serves as their "201" file.
To add a new Employee:
Login to ERPNext
Go to Human Resources. Under Employee, click Employee.
To create a new Employee, click New.
Put the mandatory information. To include other Employee details, click “Edit in Full Page”.
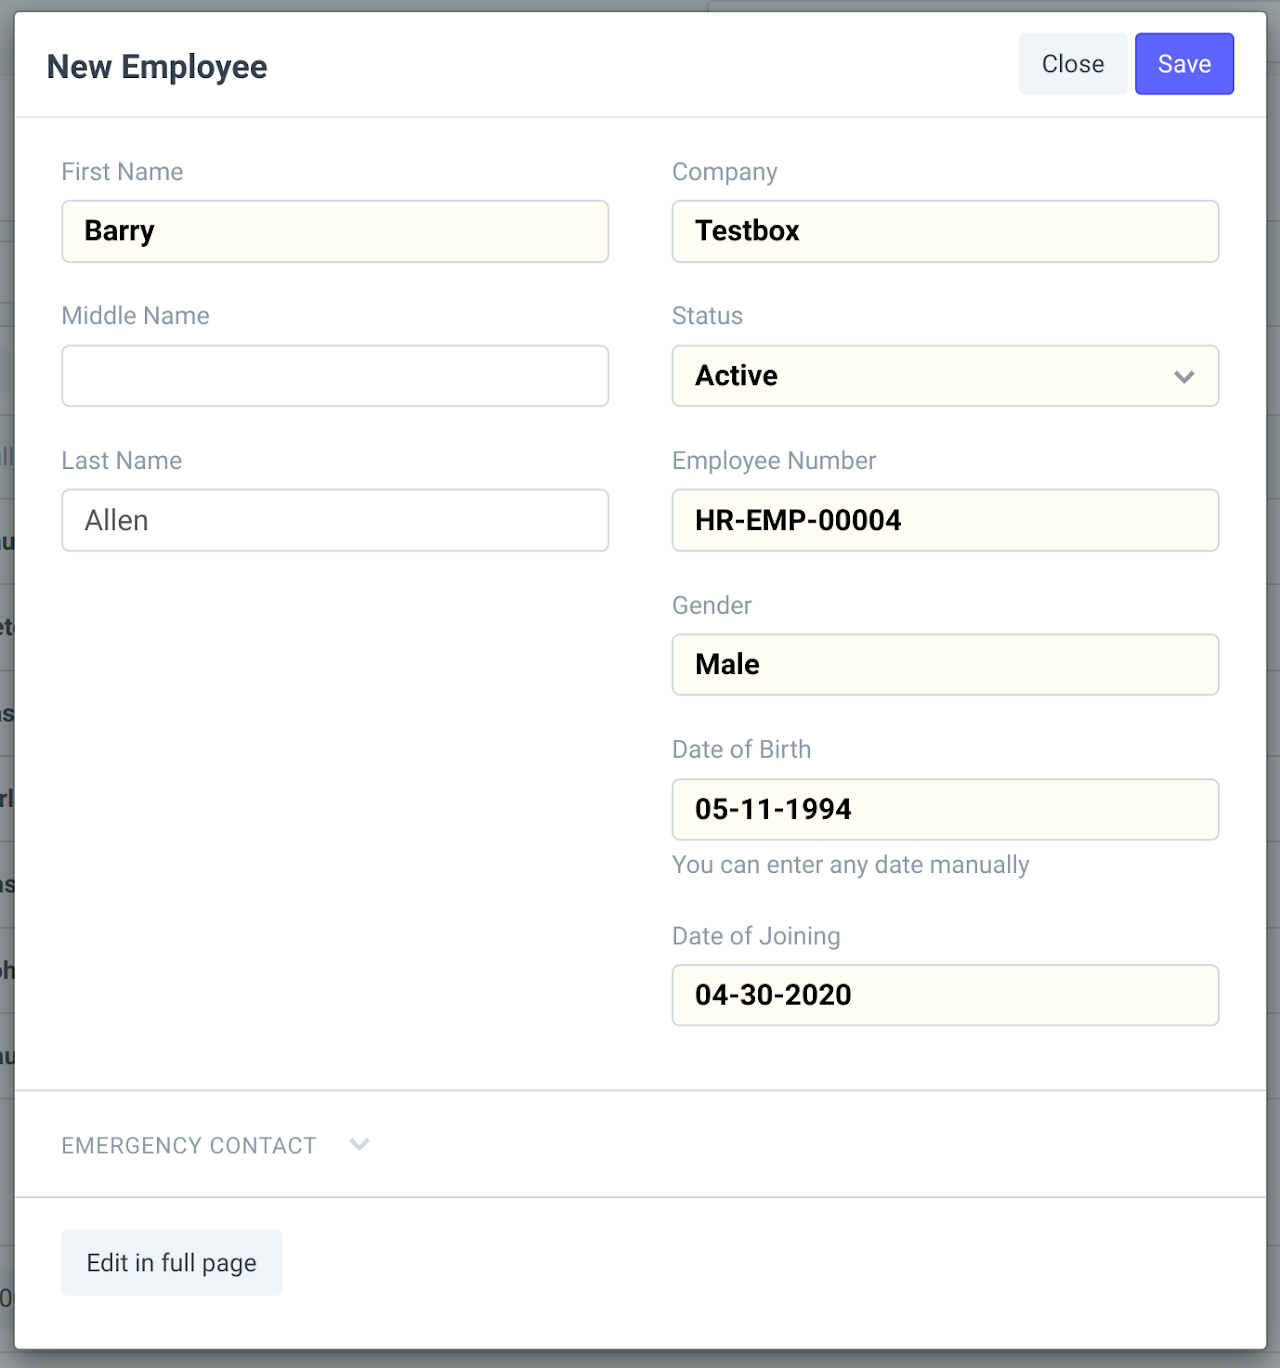
5. Click Save to create the new Employee record.
Other Features and Information you can add on the Employee master are:
Employment Type - You can set an Employment Type such as Regular, Full-time, Part-time, Probation, etc. for an Employee.
Create ERPNext User - You may link a User ID to the Employee. If the User ID is not yet created for the employee, you can click on 'Create a New User' in the dropdown to create one. By clicking on the 'Create User Permission' checkbox, the Employee's access to other records can be restricted. Check Adding Users to learn how to create users and add permissions.
Joining Details- The date details when the employee joined the company.
Department and Grade - In a company, the Employees are usually grouped on the basis of Department, Grade, Designation, and Branch. In the Department and Grade section, these details of the Employee can be saved. In the 'Reports to' field, the person to whom the Employee has to report his duties can be captured.
Leave Details - In Leave Details, you can save the Leave Policy and Holiday List details. Leave Policy specifies the type and number of leaves an Employee is entitled to, and Holiday List is a list which contains the dates of holidays and weekly offs.
Salary Details - The mode of salary payment. This can be cash, or through bank and etc.
Contact Details - Employee's Contact information such as Mobile Number, Current and Permanent Address, Personal and Company Email ID can be captured here. In the Preferred Email ID field, either the Company Email, Personal Email or User ID of the Employee can be selected depending on the user's preference.
Personal Details - Personal Details of the Employee such as Family Background details like name and occupation of parent, spouse and children, Passport Details including date and place of issue, Health Details like height, weight, allergies, medical concerns, etc. can be saved.
Educational Qualification - Here, the Educational Details such as School/University, Qualification, Level and Year of Passing of the Employee can be saved as shown below:

Additionally, details such as Class/Percentage and Subjects can also be saved by clicking on the downward arrow in the Education table.
10. Previous Work Experience - Just like Educational Qualification, an Employee's Previous Work Experience can also be captured in the External Work History table as shown below:

11. Exit - Exit details of the employee (if any) such as Resignation, Exit Interview and Leave Encashment details can be saved.