

Creating Sales Invoice in ERPNext
Guide
From Single DR
Log into your ERPNext account
2. Click on Stock > Delivery Note

3. Search for the Delivery Note (DR) you want to create a Sales Invoice (SI) for. Open the particular Delivery Note by clicking on it
4. On the upper right hand corner of the screen, click on Create and select Invoice. This will create a new, unsaved SI that imports the information found in the Delivery Note

5. Under Series select the appropriate numbering series
6. Under the item table, revise the unit quantity as needed based on actual items delivered to the customer. Note that you cannot add more quantities or more items that are not found in the original DR

7. Accounting Entries:
7.1 Under the item table, click on the item’s dropdown arrow to see the full details
a. In editing row screen, go to Accounting Details
b. Select the Sales / Income account (e.g. COGS expense account) and Cost Center accordingly

c. Click outside the edit row popup window to go back to the sales invoice screen
7.2 In the sales invoice screen, go to Account Details
a. In editing row screen, go to Accounting details
b. Select the account where the payable should be recorded and select ‘No’ in opening entry (if not an opening entry of the account)

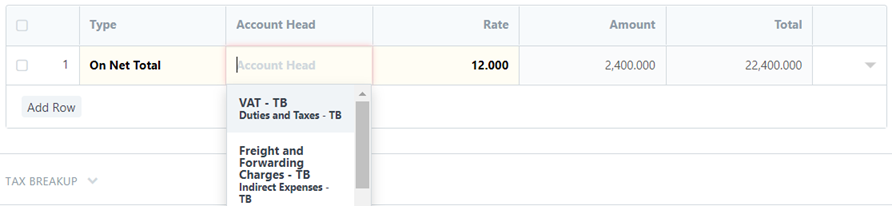
7.3 In the sales invoice screen, go to Taxes & Charges
a. Under the tax table, select the appropriate account for each tax row
8. Click or press CTRL+S to save the document. Note that this does not finalize the document yet. Instead, the sales order is still in draft status
9. Review the draft. If everything is final, click on or press CTRL+S to submit and finalize the sales invoice.
From Multiple Sales Orders
Log into your ERPNext account
2. Click on Accounting > Sales Invoice

3. Click on "New"
4. Click on Get Items From > Delivery Note

5. Select the Delivery Notes you want to consolidate into one Delivery Sales Invoice. Note that you cannot combine Delivery Notes from different customers, but you can combine different shipping addresses into one Sales Invoice. Click on Get Items after selecting.

6. Under Series select the appropriate numbering series
7. Under the item table, revise the unit quantity as needed based on actual items received by the customer. Note that you cannot add more quantities or more items that are not found in the original DR.

8. Select the appropriate accounts and cost center as per Step 7 in From Single DR
9. Click or press CTRL+S to save the document. Note that this does not finalize the document yet. Instead, the sales invoice is still in draft status
10. Review the draft. If everything is final, click on or press CTRL+S to submit and finalize the sales invoice.